Ram Horns Crochet Free Pattern: Easy Step-by-Step Guide
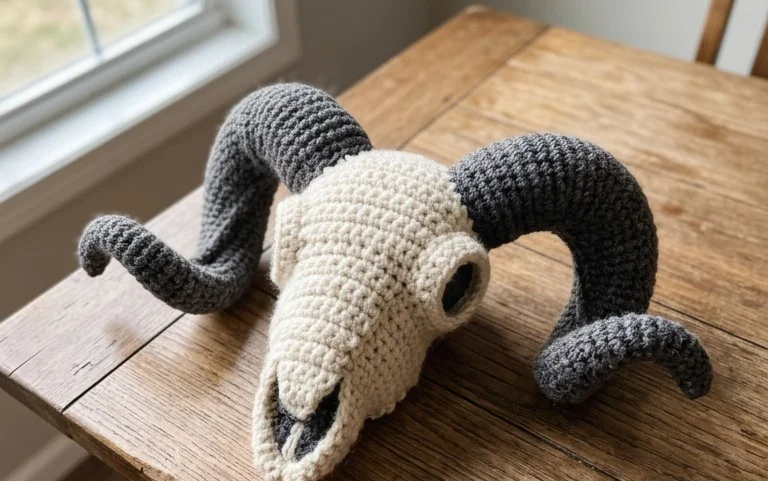
These coiled accessories bring a distinct, sculptural touch to any costume or display shelf, feeling firm and substantial in the palm of your hand. They suit anyone comfortable with single crochet who wants to experiment with shaping through increases and decreases. Making these involves working in a continuous spiral, which removes the need for visible seams and creates a smooth, professional finish. You will find that the rhythm of the constant rounds turns this into a relaxing task for long evenings. Learning to shape these horns provides a foundation for more complex stuffed items later on in your crafting journey.
Why You Will Love This Pattern
This beginner-friendly project works up quickly using basic single crochet stitches, making it an ideal choice for using up leftover bits of worsted weight yarn. The repetitive nature of the construction provides a meditative experience, allowing you to build muscle memory without complex stitch patterns or frequent color changes. Because it utilizes a modular design, you can easily create multiple items in a single sitting, which is perfect for last-minute gifts or stocking up for craft fairs. The resulting structure is dense enough to hold its shape well, ensuring your hard work remains durable and functional for years.
I managed to finish three of these in one weekend while catching up on my favorite shows. The instructions are so clear that I never had to rip out my work once.
— Sarah, hobbyist crafter
Pattern Overview & Skill Level
- Skill Level: Beginner
- Approximate Time: 1 to 2 hours per piece
- Construction: Worked in continuous rounds using a magic ring to form a three-dimensional shape
- Finished Dimensions: Approximately 3 inches tall by 3 inches wide
Materials & Supplies Needed
- Yarn: Worsted #4 weight, 100% acrylic or cotton blend, approximately 30 yards per unit.
- Hook Size: 4.0 mm / G-6 crochet hook to ensure a tight gauge that prevents stuffing from showing through.
- Notions: Tapestry needle for weaving ends, stitch markers to track the start of rounds, and polyester fiberfill for stuffing.
- Safe Yarn Substitutions: You may use DK weight yarn with a 3.5 mm hook for a smaller, tighter result, or heavy worsted cotton for a stiffer, more structured finish. Note that changing yarn weight will alter your final dimensions.
Stitch Guide & Abbreviations (US Terms)
- MR: Magic Ring
- ch: Chain
- sc: Single crochet
- inc: Increase (work 2 sc in the same stitch)
- dec: Decrease (sc two stitches together using the invisible decrease method)
- sl st: Slip stitch
- st(s): Stitch(es)
- BLO: Back Loop Only, used to create a crisp edge between the base and the body
Step-by-Step Pattern Instructions
Main Body
The body is worked from the base upward in continuous rounds. Do not join rounds unless specified.
- Rnd 1: Start 6 sc in a MR (6 sts).
- Rnd 2: Inc in each st around (12 sts).
- Rnd 3: [1 sc, inc] 6 times (18 sts).
- Rnd 4: [2 sc, inc] 6 times (24 sts).
- Rnd 5: Work in BLO, sc in each st around (24 sts).
- Rnd 6-9: Sc in each st around (24 sts).
- Rnd 10: [2 sc, dec] 6 times (18 sts). Begin stuffing the piece firmly.
- Rnd 11: [1 sc, dec] 6 times (12 sts).
- Rnd 12: Dec 6 times (6 sts).
Finishing
Cut the yarn, leaving a 6-inch tail. Thread the tail through a tapestry needle and weave it through the front loops of the remaining 6 stitches. Pull the tail tight to close the opening securely and bury the end inside the body. Flatten the base slightly against a table surface to ensure the finished item sits level.
Care & Washing Instructions
- Machine wash the item in a mesh laundry bag on the gentle cycle using cool water (max 30C/86F).
- Do not tumble dry; instead, gently press out excess water and reshape the item while damp.
- Lay flat on a clean towel in a shaded area to air dry completely to prevent the stuffing from clumping.
Pro Tips & Common Mistakes to Avoid
Maintain consistent tension throughout the project to ensure the stuffing does not poke through the gaps between stitches. Always place a stitch marker in the first stitch of every round to keep an accurate count, as continuous rounds can be difficult to track visually. When weaving in ends, pass the needle through the center of the item multiple times to lock the yarn firmly in place, which prevents the piece from unraveling over time. To adjust the size, simply add or subtract rounds between Rnd 6 and Rnd 9, though keep in mind that larger sizes will require more fiberfill and a slightly longer yarn tail for closing.
Frequently Asked Questions
Can I use a different yarn weight for this project?
Yes, you can use DK or bulky weight yarn, but you must adjust your hook size to maintain a tight fabric. A smaller hook prevents stuffing from escaping, while a larger hook might result in gaps.
Is this pattern suitable for someone who has never used a magic ring?
Yes, if you struggle with the magic ring, you can chain 2 and work your initial 6 sc into the second chain from the hook as an alternative.
How do I keep my stitch counts accurate while working in rounds?
Use a stitch marker at the start of every single round. Before moving to the next round, count your stitches to ensure you have the required total, as missing one stitch will throw off all subsequent decreases.
Am I allowed to sell items I make using this pattern?
You are welcome to sell finished items made from this pattern in small quantities. Please provide credit to this design in your product listings to support my work as an independent designer.
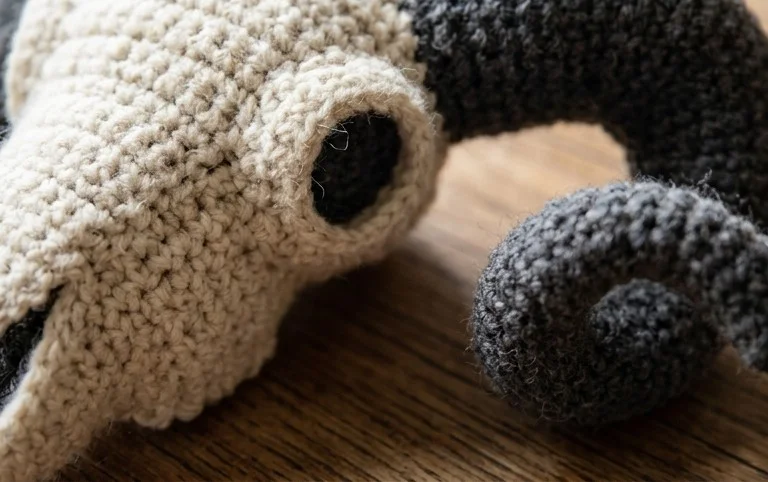
Your finished set of horns will look striking when attached to a headband or added to a stuffed animal for an extra layer of personality. You can try using a fuzzy mohair blend if you want to achieve a softer, more realistic texture instead of the standard acrylic finish. Posting a photo of your completed work helps other makers see how different colors turn out in practice. Browse the rest of the site to find more free projects for your next weekend afternoon of quiet work.