Easy Men’s Winter Ski Beanie: Free Crochet Pattern
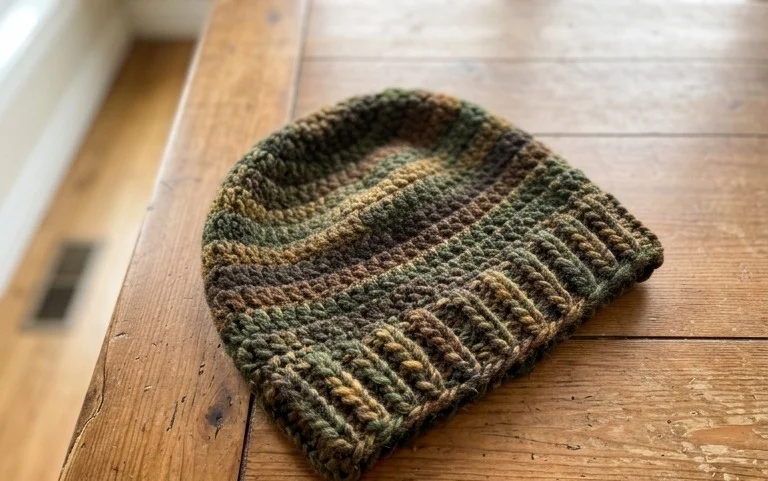
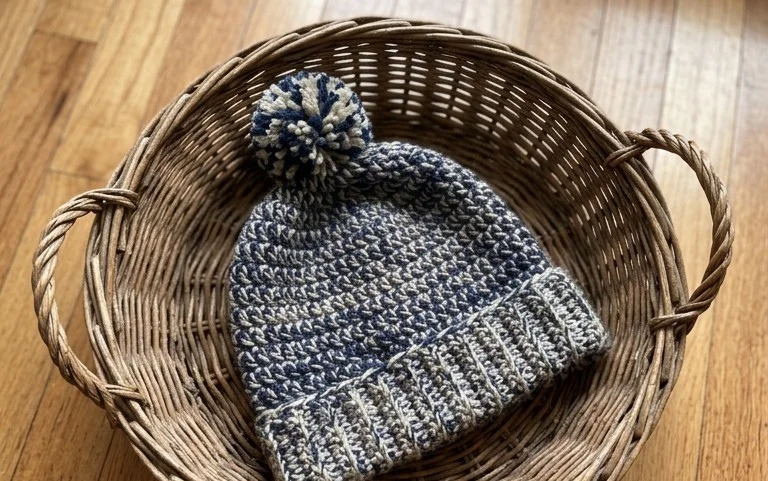
Dense, squishy stitches give this winter ski beanie a substantial feel that keeps ears warm on the coldest days. This project relies on a rhythmic construction method, making it a reliable choice for beginners who want to move past flat rectangles and into 3D garment making. You will use a combination of simple post stitches to build the ribbed brim before transitioning into a straightforward body that grows quickly under your hook. Whether you need a thoughtful handmade present or a staple accessory for your own collection, this pattern provides a clear path to a clean, professional finish.
Why You Will Love This Pattern
This beginner-friendly project creates a classic crochet beanie that uses basic stitches and simple shaping, making it a perfect introduction to garment construction. Because the pattern relies on a rhythmic, repetitive stitch pattern, it is a relaxing project for evening crochet sessions while watching television. The design is exceptionally quick to complete, requiring only a few hours of work, which makes it an ideal option for last-minute handmade gifts. Using bulky weight yarn ensures a warm, dense fabric that resists cold winds and maintains its shape well over time.
I finished this hat in one sitting and the instructions were so easy to follow. It fits perfectly and looks like something I bought from a boutique.
— Sarah, hobbyist crafter
Pattern Overview & Skill Level
- Skill Level: Beginner
- Approximate Time: 2 to 3 hours
- Construction: Worked in joined rounds from the bottom up, starting with a ribbed brim followed by a simple stitch body.
- Finished Dimensions: Fits an average adult head, 20 to 22 inches in circumference.
Materials & Supplies Needed
- Yarn: Bulky #5 weight, 100% acrylic or wool blend, approximately 150 yards.
- Hook Size: 6.0 mm (J-10).
- Notions: Tapestry needle for weaving ends, stitch markers to track round starts, and a pom-pom maker if desired.
- Yarn Substitutions: You can use a heavy worsted weight held double to achieve the same gauge. Choosing a wool blend will provide better elasticity than 100% acrylic, which may stretch out over time if not handled carefully.
Stitch Guide & Abbreviations (US Terms)
- ch: chain
- sc: single crochet
- dc: double crochet
- sl st: slip stitch
- BLO: back loop only
- st/sts: stitch/stitches
- dc2tog: double crochet two stitches together (decrease)
Step-by-Step Pattern Instructions
Brim
The brim is worked flat and then joined into a circle.
- Row 1: Ch 9. Sc in 2nd ch from hook and each ch across. (8 sts).
- Rows 2–48: Ch 1, turn. Sc in BLO of each st across. (8 sts).
- Joining: Fold the strip in half, matching the foundation chain to the last row. Sl st through both layers to join. Turn the work so the seam is on the inside.
Body
Now work in joined rounds along the long edge of the brim.
- Rnd 1: Ch 1, work 48 sc evenly around the edge of the brim. Join with a sl st to the first sc. (48 sts).
- Rnd 2: Ch 2 (counts as first dc), dc in each st around. Join with a sl st. (48 sts).
- Rnds 3–12: Repeat Rnd 2. (48 sts).
Crown Shaping
To close the top of the hat, you will decrease the stitch count.
- Rnd 13: Ch 2, dc in next 6 sts, dc2tog repeat from * to * around. Join with sl st. (42 sts).
- Rnd 14: Ch 2, dc in next 5 sts, dc2tog repeat from * to * around. Join with sl st. (36 sts).
- Rnd 15: Ch 2, dc in next 4 sts, dc2tog repeat from * to * around. Join with sl st. (30 sts).
- Rnd 16: Ch 2, dc in next 3 sts, dc2tog repeat from * to * around. Join with sl st. (24 sts).
- Rnd 17: Ch 2, dc in next 2 sts, dc2tog repeat from * to * around. Join with sl st. (18 sts).
- Rnd 18: Ch 2, dc in next 1 st, dc2tog repeat from * to * around. Join with sl st. (12 sts).
Finishing
Cut the yarn leaving a 10-inch tail. Use the tapestry needle to weave the tail through the remaining 12 stitches. Pull tightly to close the hole at the top. Secure the yarn on the inside and weave in the end.
Care & Washing Instructions
- Hand wash in cool water using a gentle wool-safe detergent to maintain the fiber integrity.
- Lay the hat flat on a clean towel away from direct sunlight to dry completely.
- Reshape the hat while damp if it loses its form during the washing process.
Pro Tips & Common Mistakes to Avoid
Maintain consistent tension throughout the project by ensuring your hook grip remains loose; tight tension will make the hat feel stiff and small. Always use a stitch marker at the start of every round to avoid accidentally adding or missing stitches, which can ruin the shape of the crown. When weaving in your ends, run the yarn tail back and forth through the stitches three times to ensure it stays secure during washing. If you wish to adjust the size, add or subtract stitches in multiples of 8, though remember that changing the size will require a different amount of yarn than specified.
Frequently Asked Questions
Can I substitute the bulky yarn for medium weight yarn?
Yes, but you will need to hold two strands of medium weight yarn together to match the gauge and size of the original pattern.
Is this pattern suitable for complete beginners?
This pattern is very accessible for beginners because it focuses on basic stitches like single and double crochet, which are the building blocks of most projects.
How do I adjust the hat to be larger?
To make the hat larger, add stitches in multiples of 8 to your foundation row of the brim. Keep in mind that a larger hat will consume more yarn.
Can I sell the hats I make from this pattern?
Please check the original designer terms if you found this elsewhere; however, for this specific pattern, you are welcome to sell finished items as long as you credit the source.
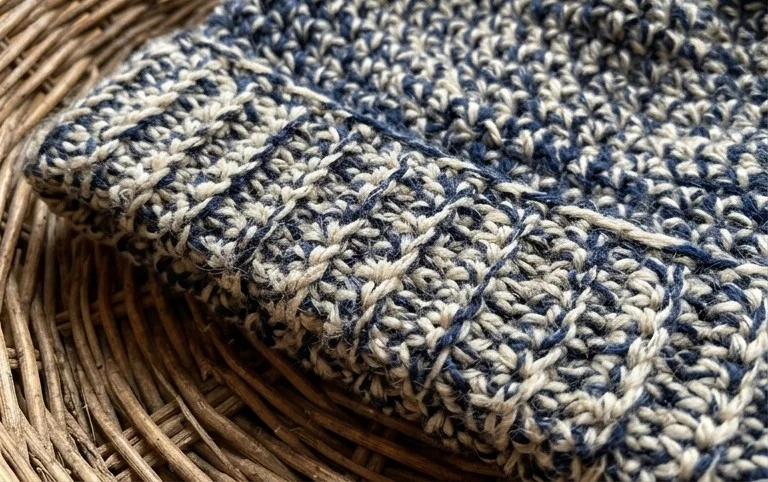
Your finished accessory looks sharp and provides plenty of warmth for long days outdoors in the snow. To change the look, try alternating between two high-contrast yarn colors every three rows to create a bold striped effect. Please share a photo of your work on your favorite social network so others can see your progress. You can find more free patterns for warm winter gear, including matching scarves and thick mittens, by browsing the rest of the blog archive.