Portable Crochet Checkerboard Game: Free Easy Pattern
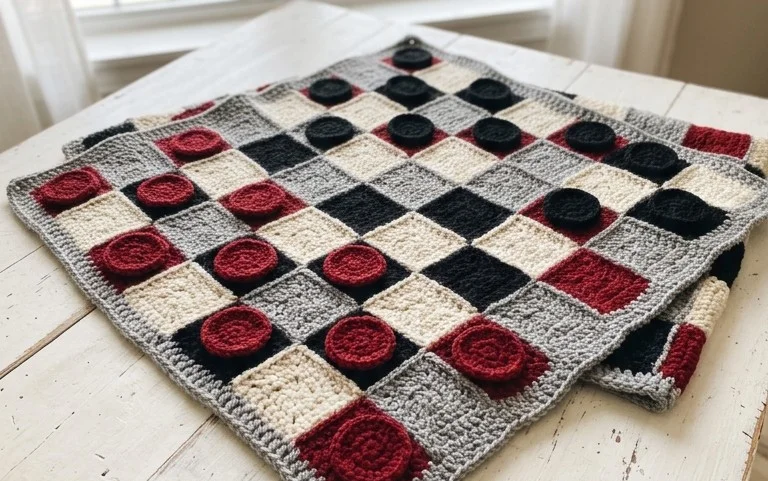
Soft wool squares stacked in a tidy pile are ready to transform into a functional board game at a moment’s notice. This project offers a tactile, satisfying way to combine simple stitching with hours of play, resulting in a flexible mat that rolls up to fit inside any tote bag. It suits beginners who want a repeatable exercise in control and color placement, as well as anyone needing a thoughtful gift that stands up to frequent use. You will learn how to maintain consistent tension while alternating shades to create a clean, sharp grid pattern without complicated joinery.
Why You’ll Love This Pattern
The Classic Crochet Granny Square is the fundamental building block of crochet heritage, favored for its versatility and portable nature. You can complete a single square in under twenty minutes, making it an ideal project for filling small pockets of downtime. Because it relies on basic double crochet stitches and chain spaces, the rhythmic motion becomes meditative quickly. This project is excellent for using up leftover yarn scraps from larger garments, as each round can be worked in a different color to create a unique, high-contrast look.
I started these squares to use up my yarn stash and ended up with a beautiful patchwork blanket. The pattern is so easy to memorize that I could crochet while watching movies without losing my place.
— Sarah, hobbyist maker
Pattern Overview & Skill Level
- Skill Level: Beginner
- Approximate Time: 15–20 minutes per square
- Construction: Working in rounds from the center outward
- Finished Dimensions: Approximately 5 inches square using worsted weight yarn
Materials & Supplies Needed
- Yarn: Worsted weight (#4), 100% acrylic or wool blend, approximately 15 yards per square.
- Hook Size: 5.0 mm (US H-8).
- Notions: Tapestry needle for weaving ends, scissors.
- Safe Yarn Substitutions: You can use DK weight yarn with a 4.0 mm hook for a smaller, tighter square, or bulky weight yarn with a 6.0 mm hook for a larger, faster-growing square.
Stitch Guide & Abbreviations (US Terms)
- ch = chain
- dc = double crochet
- sl st = slip stitch
- st(s) = stitch(es)
- sp = space
- MR = magic ring (or ch 4 and join with sl st to form a ring)
- Cluster = group of 3 dc stitches worked into the same space
Step-by-Step Pattern Instructions
This pattern is worked in the round, joining each round with a slip stitch and turning if desired for a more uniform appearance, though standard granny squares are typically worked in one direction.
Rnd 1: Start with a MR. Ch 3 (counts as first dc), work 2 dc into ring, ch 2, *3 dc into ring, ch 2; repeat from * twice more. Join with a sl st to the top of the beginning ch-3. (12 dc, 4 ch-2 sps)
Rnd 2: Sl st into the next 2 sts and into the first ch-2 sp. Ch 3, 2 dc in same sp, ch 1. *In next ch-2 sp, work (3 dc, ch 2, 3 dc), ch 1; repeat from * twice more. Work 3 dc in the final ch-2 sp, ch 2, and join with sl st to top of beginning ch-3. (24 dc, 4 ch-2 corner sps, 4 ch-1 side sps)
Rnd 3: Sl st into the next 2 sts and into the corner ch-2 sp. Ch 3, 2 dc in same sp, ch 1. *In next ch-1 sp, work 3 dc, ch 1. In next corner ch-2 sp, work (3 dc, ch 2, 3 dc), ch 1; repeat from * twice more. In final side ch-1 sp, work 3 dc, ch 1. Join with sl st to top of beginning ch-3. (36 dc, 4 ch-2 corner sps, 8 ch-1 side sps)
Rnd 4: Continue pattern by working 3 dc in every ch-1 side space and (3 dc, ch 2, 3 dc) in every corner ch-2 space. Join each round with a sl st to the top of the beginning ch-3. (48 dc, 4 ch-2 corner sps, 12 ch-1 side sps)
Finishing: Fasten off leaving a 6-inch tail. Weave in all loose ends on the wrong side of the work using a tapestry needle.
Care & Washing Instructions
- Hand wash in cool water using a mild detergent to preserve the shape and fiber integrity.
- Lay the square flat on a clean towel and reshape it to its original dimensions while damp.
- Avoid using a tumble dryer, as heat can shrink natural fibers and distort the crochet stitches.
Pro Tips & Common Mistakes to Avoid
- Maintain consistent tension by ensuring your yarn feed remains smooth throughout the project; tightness in the ch-2 corners is a common issue that causes squares to cup.
- Place a locking stitch marker in the first stitch of every round to easily identify where to join, preventing accidental increases or decreases.
- Weave your ends back and forth through the stitches of the same color to ensure they remain invisible, which is vital if you are joining squares for a garment.
- If you want to adjust the size, simply add more rounds following the established pattern of 3 dc in every side space and (3 dc, ch 2, 3 dc) in corners, keeping in mind that each additional round increases the yarn requirement by approximately 5 yards.
Frequently Asked Questions
Can I use cotton yarn for these squares?
Yes, cotton yarn works beautifully and creates a firmer, more durable square ideal for dishcloths or bags, though it will feel slightly heavier than acrylic.
Why is my square not laying flat?
If your square is rippling, you likely have too many stitches; if it is pulling inward or cupping, you may need to add an extra chain in your corners to provide more room for the turn.
How do I join these squares together?
You can join squares using a whip stitch through the back loops only or by using a slip stitch join to create a decorative raised ridge between them.
Can I sell items made from this pattern?
You are welcome to sell finished items you create, but please credit the designer and use your own photographs to represent your specific work.
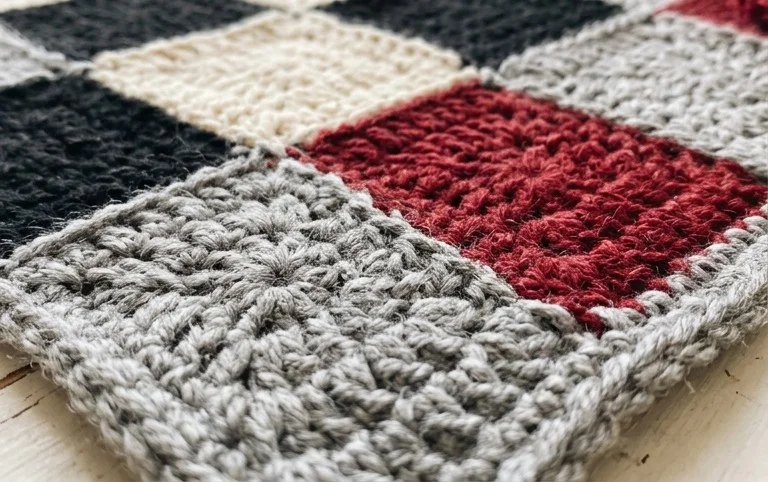
A finished checkerboard brings a sense of nostalgia to your coffee table, especially when you have handcrafted every single piece. You can swap the traditional black and white for bold navy and mustard or try using a cotton blend for a crisper, firmer stitch definition. Please share your progress or post a photo of your board during a game night on social media so others can see your color choices. Visit the main blog menu to find more free projects for your next afternoon session.