Easy Crochet Baby Blanket: Free Step-by-Step Patterns
Soft wool against your palms makes this classic blanket project a gentle way to spend an afternoon. The fabric possesses a light, airy weight that keeps little ones cozy without becoming too heavy or stiff for a stroller. Beginners find comfort in the repetitive motion, while experienced makers appreciate how quickly these modular squares assemble into a full-sized heirloom. You will master the traditional cluster technique that creates a balance between structure and drape. This process turns scattered yarn scraps into a thoughtful gift, leaving you with a warm, handmade piece that stands the test of time for any nursery.
Why You’ll Love This Pattern
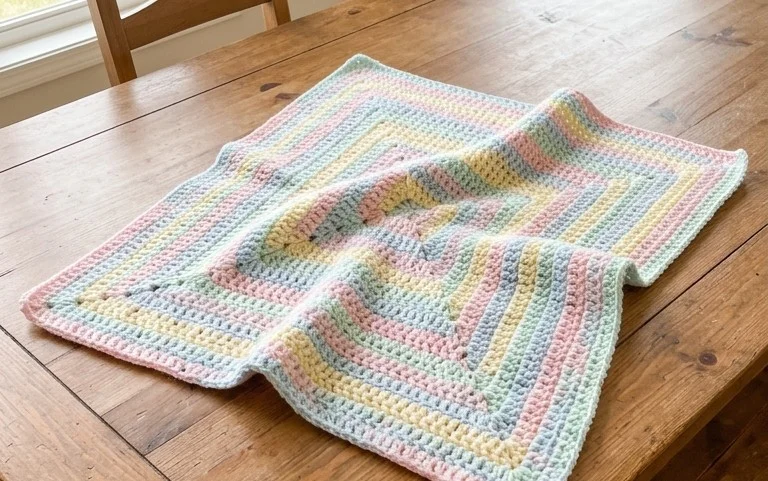
The Classic Crochet Granny Square is the foundation of countless heritage-style blankets and modular garments. This specific pattern uses a traditional three-double-crochet cluster technique that balances structure with drape. It is a highly efficient way to use leftover yarn scraps, as each square requires only a small amount of yardage. You can work these squares while traveling or relaxing, as the repetitive nature of the rounds becomes rhythmic after the first few repeats. Because the pattern relies on chain-space clusters, the squares remain lightweight even when joined together in large quantities.
I finally learned how to make these for a blanket project, and the instructions made the corner turning process so much easier than other tutorials I have tried.
— Sarah, hobbyist crafter
Pattern Overview & Skill Level
- Skill Level: Beginner
- Approximate Time: 30–45 minutes per square
- Construction: Worked in joined rounds, starting from the center and moving outward.
- Finished Dimensions: Approximately 5 inches by 5 inches using medium weight yarn.
Materials & Supplies Needed
- Yarn: Worsted #4 weight, 100% wool or acrylic blend, approximately 15–20 yards per square.
- Hook Size: 5.0 mm (H-8).
- Notions: Tapestry needle for weaving in ends, scissors, and optional locking stitch markers for identifying the first corner.
- Safe yarn substitutions: You can use DK weight yarn with a 4.0 mm hook for a smaller, denser square, or bulky weight yarn with a 6.0 mm hook for a larger, quicker square. Note that gauge changes significantly with different yarn weights, which will affect your final blanket size.
Stitch Guide & Abbreviations (US Terms)
- ch: chain
- st/sts: stitch/stitches
- sl st: slip stitch
- dc: double crochet
- sp: space
- Cluster: a group of 3 dc stitches worked into the same space.
Step-by-Step Pattern Instructions
Granny Square Body
The square is built by working into the gaps created by the chains of the previous round.
- Rnd 1: Ch 4, join with sl st to first ch to form a ring. Ch 3 (counts as first dc), work 2 dc into the ring, ch 2, 3 dc into ring, ch 2 three times. Join with sl st to top of beginning ch-3. (12 dc, 4 ch-2 spaces)
- Rnd 2: Sl st into the next ch-2 corner space. Ch 3, 2 dc, ch 2, 3 dc into same corner space. Ch 1, skip next 3 dc, (3 dc, ch 2, 3 dc) into next corner space. Repeat from * to * two more times. Ch 1, skip last 3 dc, join with sl st to top of beginning ch-3. (24 dc, 4 corner spaces, 4 side spaces)
- Rnd 3: Sl st into the next corner space. Ch 3, 2 dc, ch 2, 3 dc into same corner space. Ch 1, 3 dc into next ch-1 space, ch 1, (3 dc, ch 2, 3 dc) into next corner space. Repeat from * to * two more times. Ch 1, 3 dc into last ch-1 space, ch 1, join with sl st to top of beginning ch-3. (36 dc, 4 corner spaces, 8 side spaces)
- Rnd 4: Sl st into the next corner space. Ch 3, 2 dc, ch 2, 3 dc into same corner space. Ch 1, (3 dc into next ch-1 space, ch 1) twice, (3 dc, ch 2, 3 dc) into next corner space. Repeat from * to * two more times. Ch 1, (3 dc into next ch-1 space, ch 1) twice, join with sl st to top of beginning ch-3. (48 dc, 4 corner spaces, 12 side spaces)
Finishing
Cut your yarn, leaving a 6-inch tail. Pull the tail through the final loop. Use a tapestry needle to weave the end through the back of the stitches to secure it. If you are joining multiple squares, leave a longer tail if you prefer to use the yarn end for the seaming process.
Care & Washing Instructions
- Hand wash in cool water using a gentle wool detergent to preserve fiber integrity.
- Lay the square flat on a clean towel and reshape it to your original dimensions while damp.
- Avoid using a dryer, as high heat can shrink wool or distort the shape of acrylic fibers.
Pro Tips & Common Mistakes to Avoid
Maintain consistent tension by holding your yarn with a steady grip, especially during the corner chain stitches, as these spaces tend to tighten up if worked too loosely. Use a stitch marker to keep track of the starting chain-3 so you know exactly where to join at the end of every round. Weave in your ends diagonally across the back of the clusters to ensure they stay hidden and do not poke through to the front. To adjust the size, simply continue repeating the logic of Rnd 3 and Rnd 4 for as many rounds as you need; remember that each additional round will consume roughly 20-30% more yarn than the previous round.
Frequently Asked Questions
Can I use different colors for each round?
Yes, you can change colors at the start of any round. Simply finish the final sl st of a round with the new color to create a clean transition.
Is this pattern suitable for complete beginners?
This pattern is ideal for beginners because it uses only basic stitches and clear, repetitive geometry that makes it easy to spot mistakes.
Can I sell the blankets I make from these squares?
You are welcome to sell finished items made from this pattern, though it is professional courtesy to credit the designer or provide a link to the pattern source.
Why is my square curling at the edges?
Curling usually happens if your tension is too tight or your corner chain spaces are too small. Ensure you are fully completing the ch-2 in the corners to allow the square to lay flat.
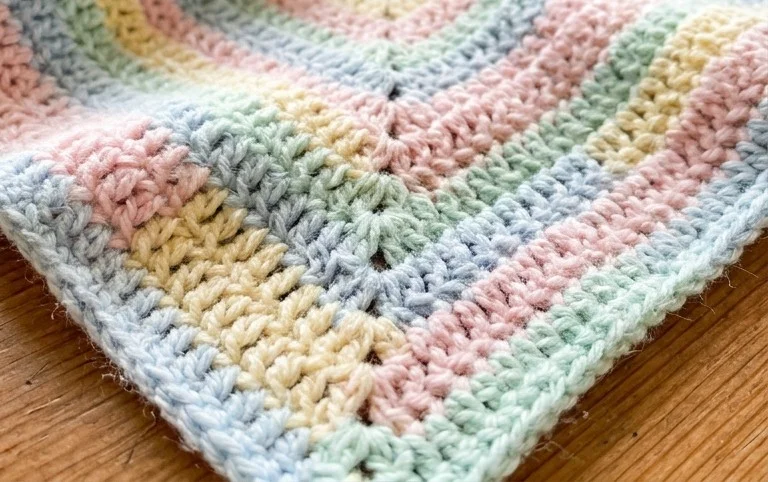
Wrapping your finished blanket around a baby provides a deep sense of accomplishment that simple store-bought gifts cannot match. You can adjust the size easily by adding more squares to the border or switching to a soft cotton yarn for a lighter summer version. Posting a picture of your finished work helps others visualize their own color combinations for their unique projects. Feel free to browse through the rest of the site for more free patterns to start your next creative project today.